How to Replace a Toilet
Replace a toilet when it shows signs of aging like persistent clogging, leaks, or inefficient flushing. Toilets, even the most resilient ones, eventually wear out with time and use. If you notice these telltale signs, it’s likely time to consider a replacement.
Read on the process of how to replace a toilet, equipping you with the knowledge and confidence to tackle this seemingly daunting task with ease.
Contents
- 1 Understanding Toilet Lifespan
- 2 Signs It’s Time for a Replacement
- 3 Preparing for Toilet Replacement
- 4 Step-by-Step Guide to Toilet Replacement
- 4.1 Step 1: Turn Off the Water Supply and Drain the Toilet
- 4.2 Step 2: Disconnect the Water Supply Line
- 4.3 Step 3: Remove the Mounting Nuts and Bolts
- 4.4 Step 4: Lift and Remove the Toilet
- 4.5 Step 5: Remove the Old Wax Ring
- 4.6 Step 6: Install the New Wax Ring
- 4.7 Step 7: Position and Set the New Toilet
- 4.8 Step 8: Secure the Mounting Hardware
- 4.9 Step 9: Connect the Water Supply Line
- 4.10 Step 10: Caulk and Final Touches
- 5 Maintenance and Care for Your New Toilet
- 6 When to Call a Professional Plumber
- 7 FAQ
- 7.1 Can I replace my toilet myself?
- 7.2 Is it difficult to change a toilet?
- 7.3 Can you replace an old toilet with any new toilet?
- 7.4 How long does it take to replace a whole toilet?
- 7.5 What do you need to know when replacing a toilet?
- 7.6 Does a new toilet come with a wax ring?
- 7.7 Should I call a plumber to replace a toilet?
Understanding Toilet Lifespan
Before replacing a toilet, know its lifespan varies with quality, usage, and maintenance. Most experts suggest replacing every 10-15 years, though a well-maintained, high-quality toilet can last up to 50 years or more.
Factors Affecting Toilet Lifespan
Several factors can influence the lifespan of your toilet, including:
- Water Quality: Hard water, which is rich in minerals like calcium and magnesium, can accelerate the buildup of limescale within the toilet’s internal components, leading to premature wear and tear.
- Usage: Toilets in high-traffic households or commercial settings will inevitably experience more wear and tear than those in low-use environments.
- Maintenance: Regular cleaning and prompt attention to minor issues can significantly extend the life of your toilet.
- Quality: Higher-quality toilets, constructed with durable materials and advanced flushing mechanisms, tend to have a longer lifespan compared to their more budget-friendly counterparts.
Signs It’s Time for a Replacement
While some toilets reach the end of their lifespan without exhibiting obvious physical signs, others will provide clear indicators that it’s time for an upgrade. Here are some telltale signs to watch out for:
Persistent Clogging and Overflowing
If your toilet is constantly clogging or overflowing, it could be a sign that the internal components are worn out or that the flushing mechanism is no longer functioning efficiently. Persistent clogs can also indicate an underlying issue with your plumbing system, which may require professional evaluation.
Increased Water Consumption
An aging toilet may start using more water per flush, leading to an unexpected spike in your water bill. This inefficiency can be attributed to worn-out flushing mechanisms or leaks within the tank or bowl. Upgrading to a modern, water-efficient toilet can help you save money on your utility bills while reducing your environmental impact.
Visible Cracks or Leaks
Cracks or leaks in the toilet tank, bowl, or base are clear indications that it’s time for a replacement. These issues not only compromise the toilet’s functionality but can also lead to water damage and potential health hazards if left unaddressed.
Frequent Repair Needs
If you find yourself frequently calling a plumber to address issues with your toilet, such as a constantly running tank, stuck handle, or other recurring problems, it may be more cost-effective to invest in a new toilet rather than continuing to pay for repairs.
Preparing for Toilet Replacement
Once you’ve determined that your toilet needs to be replaced, it’s time to prepare for the task ahead. Here are some essential steps to take before embarking on the replacement process:
Gather the Necessary Tools and Materials
To ensure a smooth and successful toilet replacement, you’ll need to have the following tools and materials on hand:
- Adjustable wrench
- Tongue-and-groove pliers
- Putty knife
- Hacksaw (if needed)
- Bucket or large sponge
- New toilet (choose the appropriate size and style)
- Wax ring (or toilet mounting ring)
- Toilet shims (if needed)
- Silicone caulk (optional)
- Old towels or cardboard to protect the floor
Measure for the Right Fit
Before purchasing a new toilet, it’s crucial to measure your existing toilet to ensure you get the right size and style. Toilets typically come in two bowl shapes: round and elongated. Measure the length of your current toilet bowl and the distance between the mounting holes to determine which size you need.
Choose a Water-Efficient Model
When selecting a new toilet, consider opting for a water-efficient model. These toilets are designed to use significantly less water per flush compared to older models, resulting in substantial savings on your water bill while also conserving a precious natural resource.
Step-by-Step Guide to Toilet Replacement
Now that you’ve prepared for the task, it’s time to roll up your sleeves and get to work. Here’s a step-by-step guide to help you navigate the toilet replacement process:
Step 1: Turn Off the Water Supply and Drain the Toilet
Before you begin, locate the water supply valve behind the toilet and turn it clockwise to shut off the water supply. Flush the toilet to empty the tank and bowl, and use a sponge or bucket to remove any remaining water.
Step 2: Disconnect the Water Supply Line
Using tongue-and-groove pliers, disconnect the water supply line from the bottom of the toilet tank. This will allow you to remove the tank and bowl assembly without spilling water everywhere.
Step 3: Remove the Mounting Nuts and Bolts
Locate the mounting nuts and bolts that secure the toilet to the floor. These are typically located underneath decorative caps or covers. Use an adjustable wrench to remove the nuts and bolts, taking care not to damage the porcelain or floor.
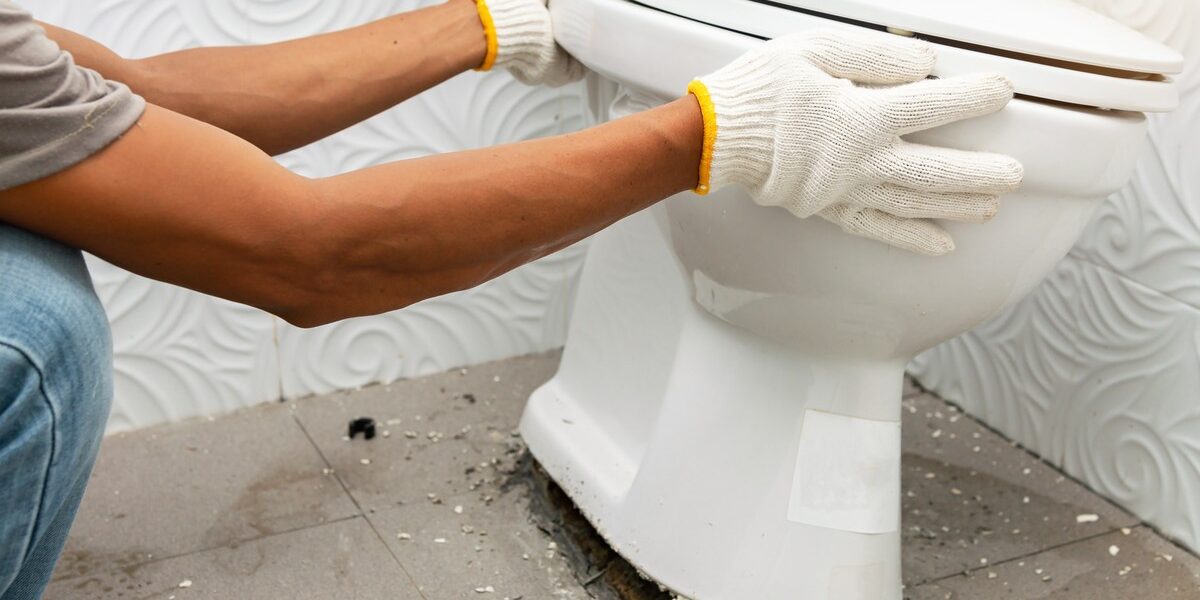
Step 4: Lift and Remove the Toilet
With the mounting hardware removed, you can now lift the toilet off the floor. This step may require some muscle, as toilets can be quite heavy. Consider enlisting the help of a friend or using a tool like the Pick Up Stix to make the lifting process easier and safer.
Step 5: Remove the Old Wax Ring
Once the toilet is removed, use a putty knife to scrape off the old wax ring from the floor flange and the bottom of the toilet bowl. Ensure that both surfaces are clean and free of debris before installing the new wax ring.
Step 6: Install the New Wax Ring
Place a new wax ring over the floor flange, ensuring that it is properly centered and level. If the flange is damaged or not level, you may need to replace or repair it before proceeding.
Step 7: Position and Set the New Toilet
Carefully lift the new toilet and position it over the floor flange, aligning the mounting holes with the bolts. Gently lower the toilet onto the wax ring, applying even pressure to ensure a proper seal.
Step 8: Secure the Mounting Hardware
Once the toilet is in place, install the washers and nuts onto the mounting bolts. Tighten the nuts gradually and evenly, being careful not to over-tighten, as this can crack the porcelain.
Step 9: Connect the Water Supply Line
Reconnect the water supply line to the fill valve on the toilet tank, tightening it securely with pliers. Turn the water supply back on and check for leaks around the base and connections.
Step 10: Caulk and Final Touches
For a clean, finished look, consider applying a bead of silicone caulk around the base of the toilet, sealing it to the floor. Some installers prefer to leave a small gap at the back to allow any future leaks to be visible.
Maintenance and Care for Your New Toilet
Once your new toilet is installed and functioning properly, it’s essential to maintain and care for it to ensure its longevity. Here are some tips to keep your toilet in top shape:
- Regularly clean the toilet bowl and tank with a mild, non-abrasive cleaner to prevent mineral buildup and staining.
- Avoid flushing non-biodegradable items, such as feminine hygiene products, paper towels, or disposable wipes, as they can cause clogs and damage the toilet’s internal components.
- Consider installing a toilet tank water-saving device, such as a displacement bag or adjustable flapper, to reduce water consumption.
- Inspect the toilet regularly for leaks or cracks, and address any issues promptly to prevent further damage.
- Replace the wax ring every 10 to 15 years or whenever you notice signs of leakage around the base of the toilet.
When to Call a Professional Plumber
While toilet replacement can be a DIY project for handy homeowners, there are certain situations where it’s advisable to call in a professional plumber:
- If you encounter any issues with your plumbing system, such as clogged or damaged pipes, that may be contributing to the toilet’s problems.
- If you’re unsure about your ability to properly install the new toilet, as improper installation can lead to leaks, damage, and potential health hazards.
- If you’re replacing a toilet in a challenging location, such as a small bathroom or a space with limited access.
- If you’re undertaking a larger bathroom remodel project that involves relocating the toilet or making significant plumbing alterations.
Remember, proper preparation, attention to detail, and a willingness to seek professional help when needed are key to a successful toilet replacement project. Happy flushing!
FAQ
Can I replace my toilet myself?
Yes, replacing a toilet is a task that many homeowners can tackle themselves with the right tools, instructions, and a bit of patience. However, if you’re unsure about your ability or encounter any complications, it’s best to call a professional plumber.
Is it difficult to change a toilet?
Changing a toilet is generally not considered a difficult task, especially if you follow the proper steps and have the necessary tools. However, it can be physically demanding due to the weight of the toilet and may require some basic plumbing knowledge.
Can you replace an old toilet with any new toilet?
While it’s possible to replace an old toilet with a new one, it’s important to ensure that the new toilet is the correct size and style for your bathroom. Measure the existing toilet and choose a replacement that fits the same footprint and mounting holes.
How long does it take to replace a whole toilet?
The time it takes to replace a toilet can vary depending on your experience and any unforeseen complications. On average, a skilled DIYer can complete the task in 1-2 hours, while a professional plumber may take slightly less time.
What do you need to know when replacing a toilet?
When replacing a toilet, it’s essential to know the correct size and style needed for your bathroom, have the necessary tools and materials on hand, understand the steps involved in the replacement process, and be prepared to handle any potential issues that may arise.
Does a new toilet come with a wax ring?
Yes, most new toilets come with a wax ring included. The wax ring is crucial for creating a watertight seal between the toilet and the flange, preventing leaks and ensuring a proper fit. However, it’s always good to check the product details to be sure.
Should I call a plumber to replace a toilet?
While many homeowners can replace a toilet themselves, it’s advisable to call a professional plumber if you encounter any complications, have a challenging installation location, or are unsure about your ability to complete the task correctly.


 Hi I'm Joe.